Normally I don’t go around and show my meat to strangers on the internet. That’s something for people with paying subscribers 🤨
Today I’ll make an exception.
This winter I cured and cold-smoked my own ham. I did the same thing last winter and was surprised how well it worked, so I decided to try again this year. The whole process takes a few weeks but it’s easy to get started if you’ve got some time and tools at hand. I had a lot of fun doing this and learned a lot about the ancient art of curing meat along the way. The results are great, and it’s delightful to be able to share something delicious with family and friends. So I thought I’d share some of my joy with all of you and walk you through the process.
Hey there! 👋
This post contains pictures of food, raw meat and stuff. I know that this is not everyone’s cup of tea. If that’s you, you might want to read something else instead. Just a heads up.
Curing is an old way to make food last longer and add some flavor while you’re at it. There are various ways to do it but the principle is always the same: You add a shitton of salt to your food1, let it sit in there for a while, and let the salt draw the moisture out of your food to preserve it. A low amount of water means that bacteria can’t find a good breeding ground on your preserved food and spoil it. Kinda like a mummy, I guess. It’s a super handy way to make your food last longer without refrigeration - which is why it’s been in wide use for most of human history.
There’s a ton of famous kinds of cured meats out there. In Italy they dry-cure prosciutto crudo (like the famous prosciutto di parma), make pancetta out of pork belly or guanciale out of pork cheeks. In Spain, they do something similar with their jamón serrano and the more special jamón iberico. Bacon, Speck, Black Forest Ham, you’ll find a ton of regional specialities all over the globe, all following the same idea. Take some meat and dry it to make it last and add flavor.
While folks in sunny and toasty mediterranean countries might get away with curing and air-drying their stuff to create world-famous delicacies, we folks in the more drab and rainy regions of this planet traditionally take an extra step and cold-smoke our cured meat before letting it dry and age some more. Cold-smoking once more ensures that bacteria can’t get hold on the surface of your meat and it adds some distinct flavor you wouldn’t get from air-drying alone.
This is also what I did with my ham this year. Ham’s Ham. Ha!2
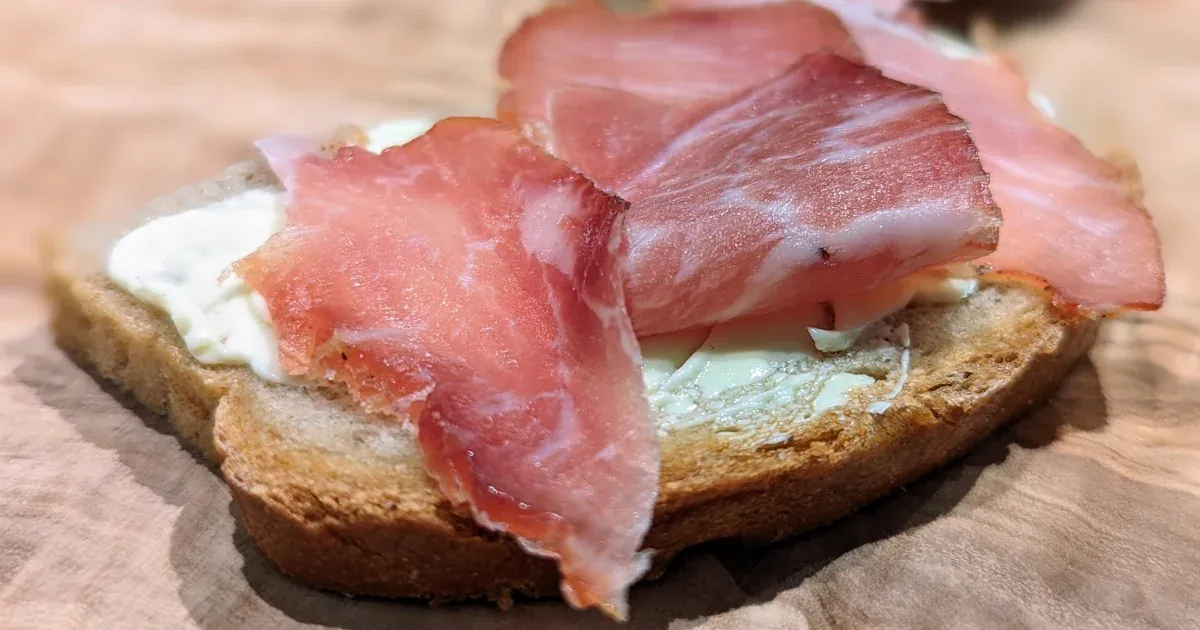 The result: dry-cured and cold-smoked ham on a piece of bread
The Making of Ham’s Ham
A word of warning: Be careful when you cure your own food. If you fuck this up you risk food poisoning and potentially serious health consequences. At the end of this process, you’ll have a piece of meat that’s still raw - it hasn’t been cooked whatsoever, it just dried to a level where bacteria can’t do much harm and spoil it as quickly. The whole process is not rocket science but you don’t want to be stupid about it either. I’m not giving you a full recipe here but will walk you through the process I did, roughly. I’m new to this myself and don’t think I should be handing out advice. If you’re curious about curing your own meat, go and find a recipe from a reputable source (there are lots of books out there that explain the topic in great detail) and make sure to follow it closely. Stay safe and enjoy! ✌️
The entire process took me about 3 weeks of hands-on time. 10 days for curing, 5 days for drying, and 4 days for cold-smoking. After that, the ham’s hanging out for air-drying and aging, without me having to do anything but admire the delicious smell. This sounds like a lot of work, but on most days all the work I needed to do was literally done in one minute.
Step 1: Curing
The first step is getting a decent piece of meat and preparing it for the curing process. People usually take pork, but you can use duck, venison, boar, and plenty of other stuff as well. You can use more fatty or more lean cuts — it’s totally up to you, your taste, and what you’ve got available. This year, I went to a local farmer and butcher who sells beef and pork from animals growing up on their small farm a few kilometers from my home. They got me a really nice 4kg piece from the leg (more specifically from the “Unterschale” as German butchers say). I left the skin and fat on my piece of meat, cut it down into 8 smaller pieces of about 500g each (I’m still learning this, so I didn’t want to take two huge pieces and risk messing up and having to throw them all away). I trimmed and cleaned up the smaller pieces so that no loose ends remained and then applied a mix of curing salt, garlic, pepper, sugar, coriander and allspice. I decided to use a curing method where you put your meat and curing salt in a vacuum sealed bag (like the ones you’d use for sous vide cooking). The benefit is that this method is super clean and hassle-free. You throw the vacuum sealed bags in your fridge for a couple of days and make sure to turn them once per day while the curing salt does its magic.
After curing the meat for a few days I removed it from the vacuum sealed bags and was presented with an almost crimson color.
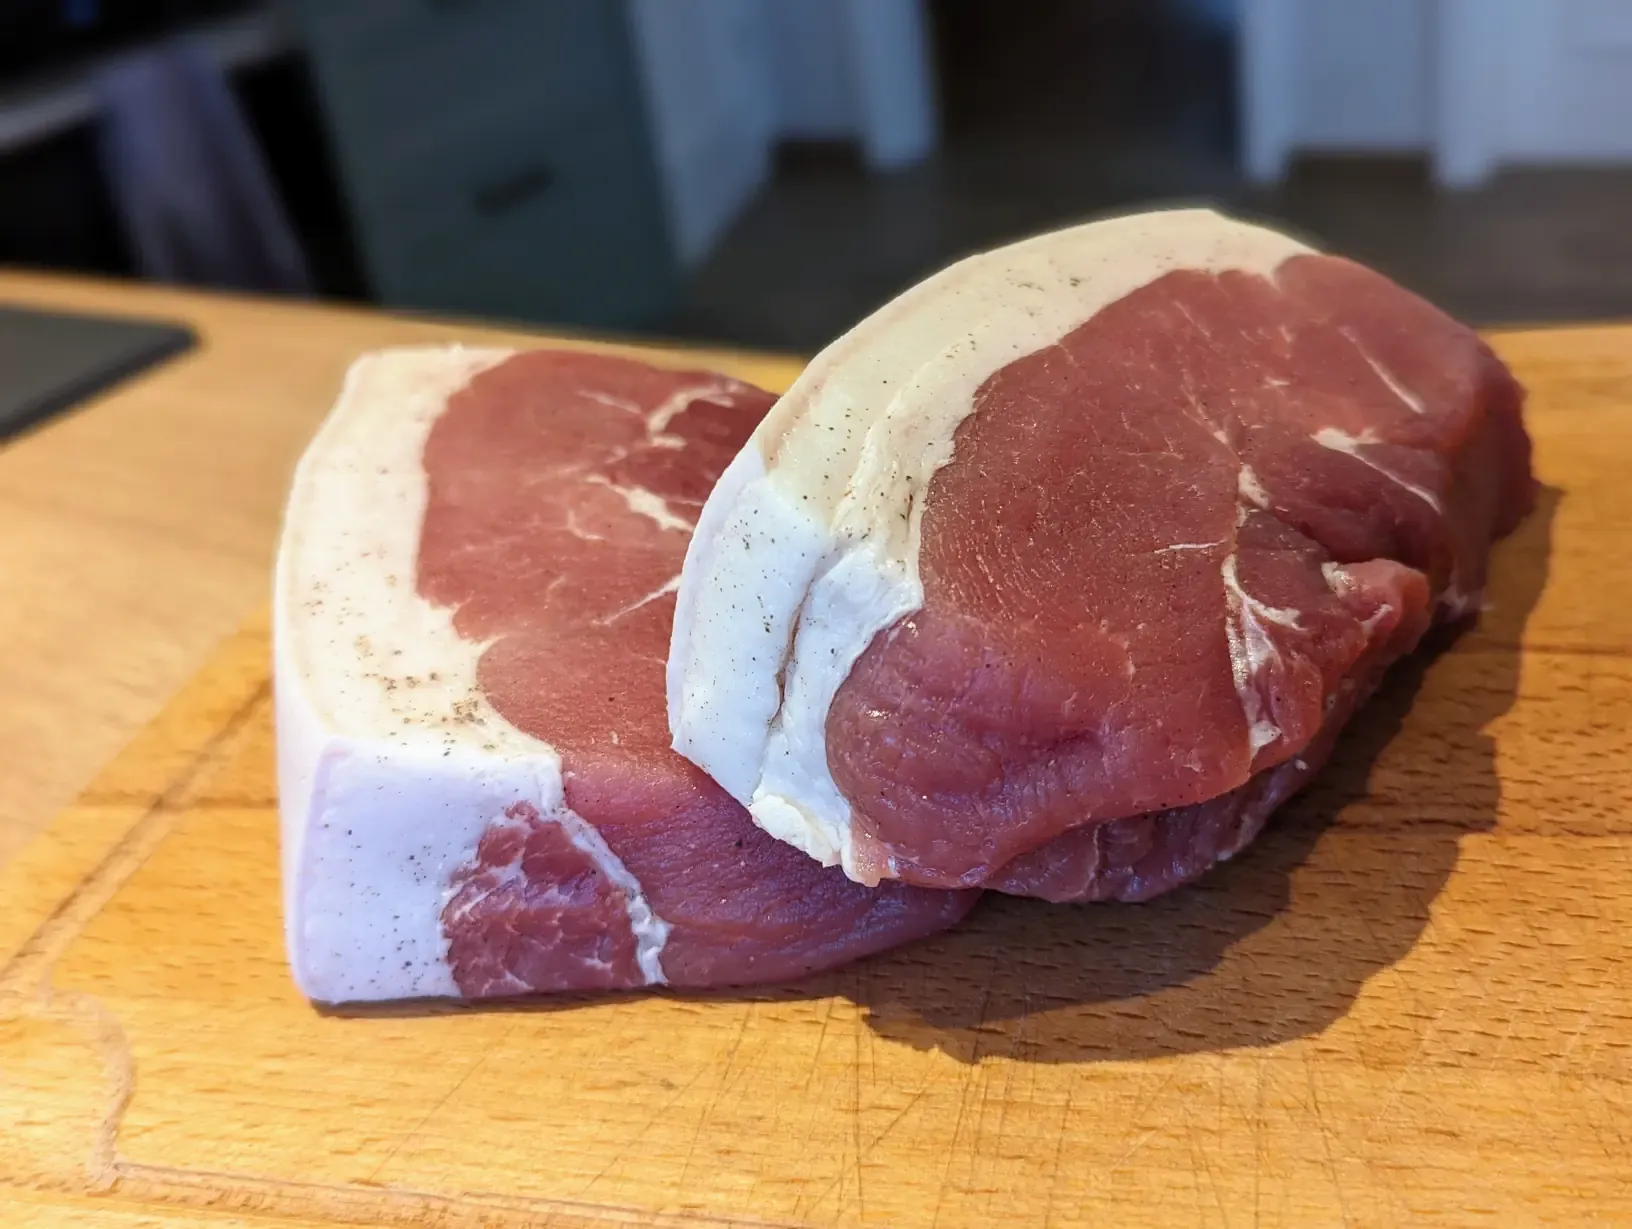 Two pieces of meat after dry-curing for a couple of days
Heads up: You’ll need to look up the right amount of curing salt and time to cure (and dry) your meat. This is essential — too little, too short, and your food will spoil and you’ll get nothing but a few days curled up on your bathroom floor or worse. I’m not giving you recommendations here and encourage you to look this up from a reputable source. Again, there are books out there explaining all of this with a lot of background information.
Step 2: Drying
Now that the curing salt has started drawing out a good chunk of moisture, the meat needs to air-dry for a few days. During this phase, ventilation, temperature and humidity are something to keep an eye on. Since the meat is still raw (always will be) and fairly moist, you need to keep it in a rather low-temperature environment, between 7°C and 18°C (45°F - 65°F for my imperial friends). Your fridge works well here but make sure to get some air circulation in by opening the door once or twice a day for a little. Some people use their cellar or garage for this phase, and if you’re feeling fancy pants you can even get a dedicated drying cabinet. It’s okay to be a little creative here as long as the temperature, ventilation, and humidity are in a good range.
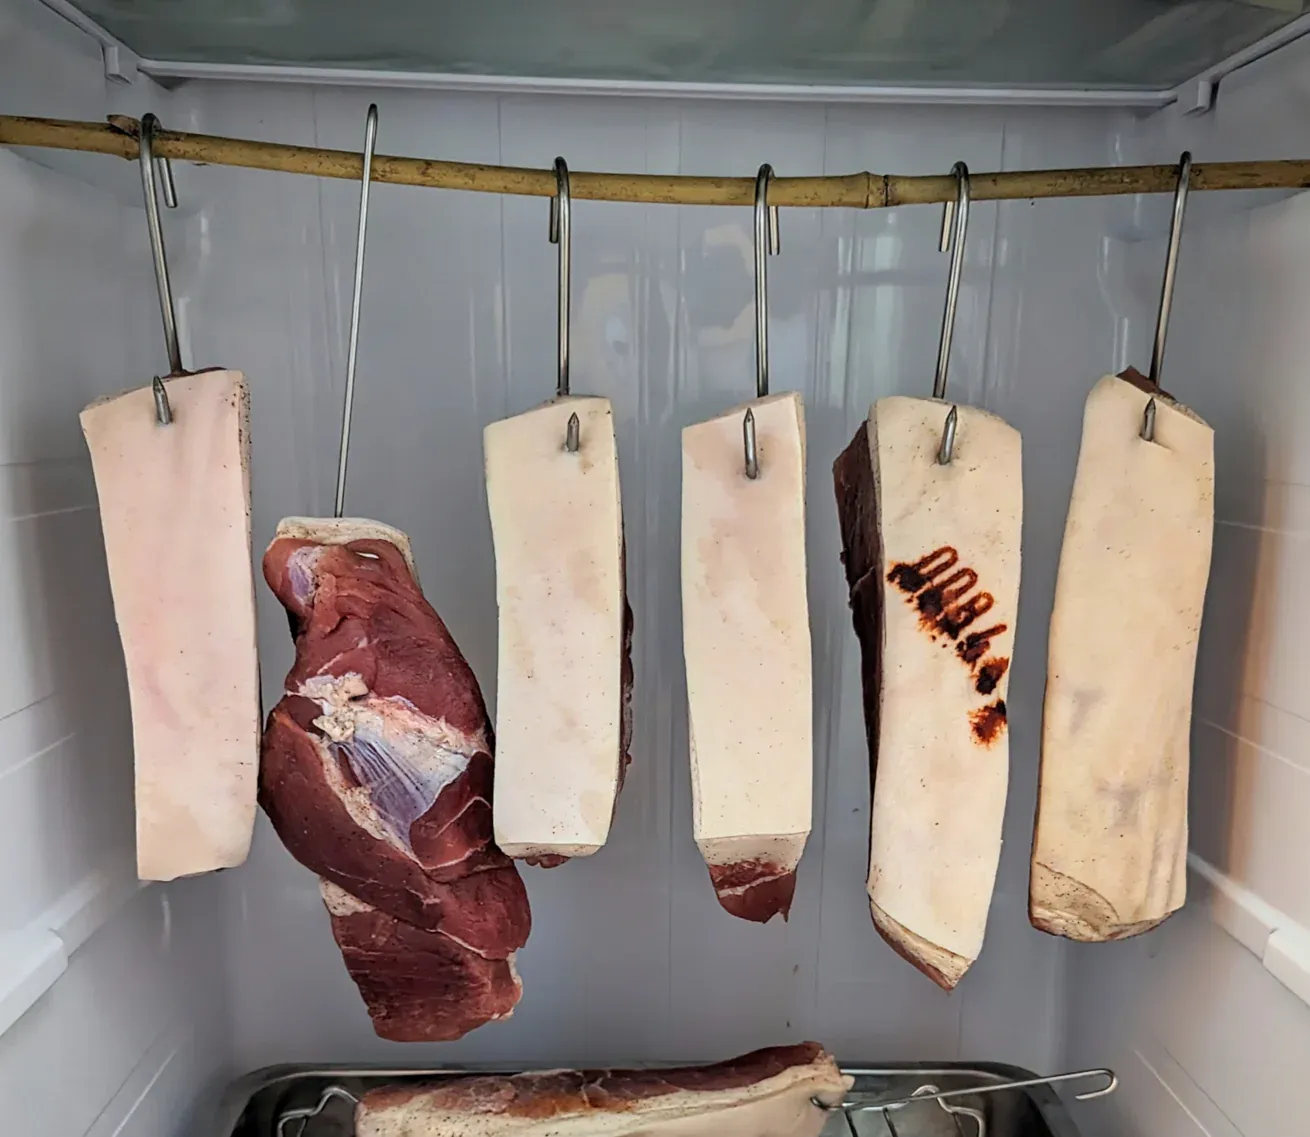 Drying the meat in the fridge after curing
Step 3: Cold-Smoking (optional)
After a few days of drying and proper ventilation the ham is ready for the next phase: Cold-smoking. Depending on your personal taste and the kind of ham you want to make, you can totally skip this step and go directly to the air-drying phase (that’s what they’d do in Italy and Spain). I decided to cold-smoke my ham, for a few reasons: When I did this a few weeks back, it had been raining for weeks on end; the humidity in my garage — where I’d planned to do the air-drying — was super high and I didn’t want to risk spoiling the ham. Another reason is that cold-smoking gives me a little more comfort when it comes to trusting the shelf-life of my hams. Cold-smoked ham is the more traditional way of making ham in Germany, and I kinda wanted to stick to this tradition. And lastly, I simply like a mild smoke flavor. So off into the smoker it goes!
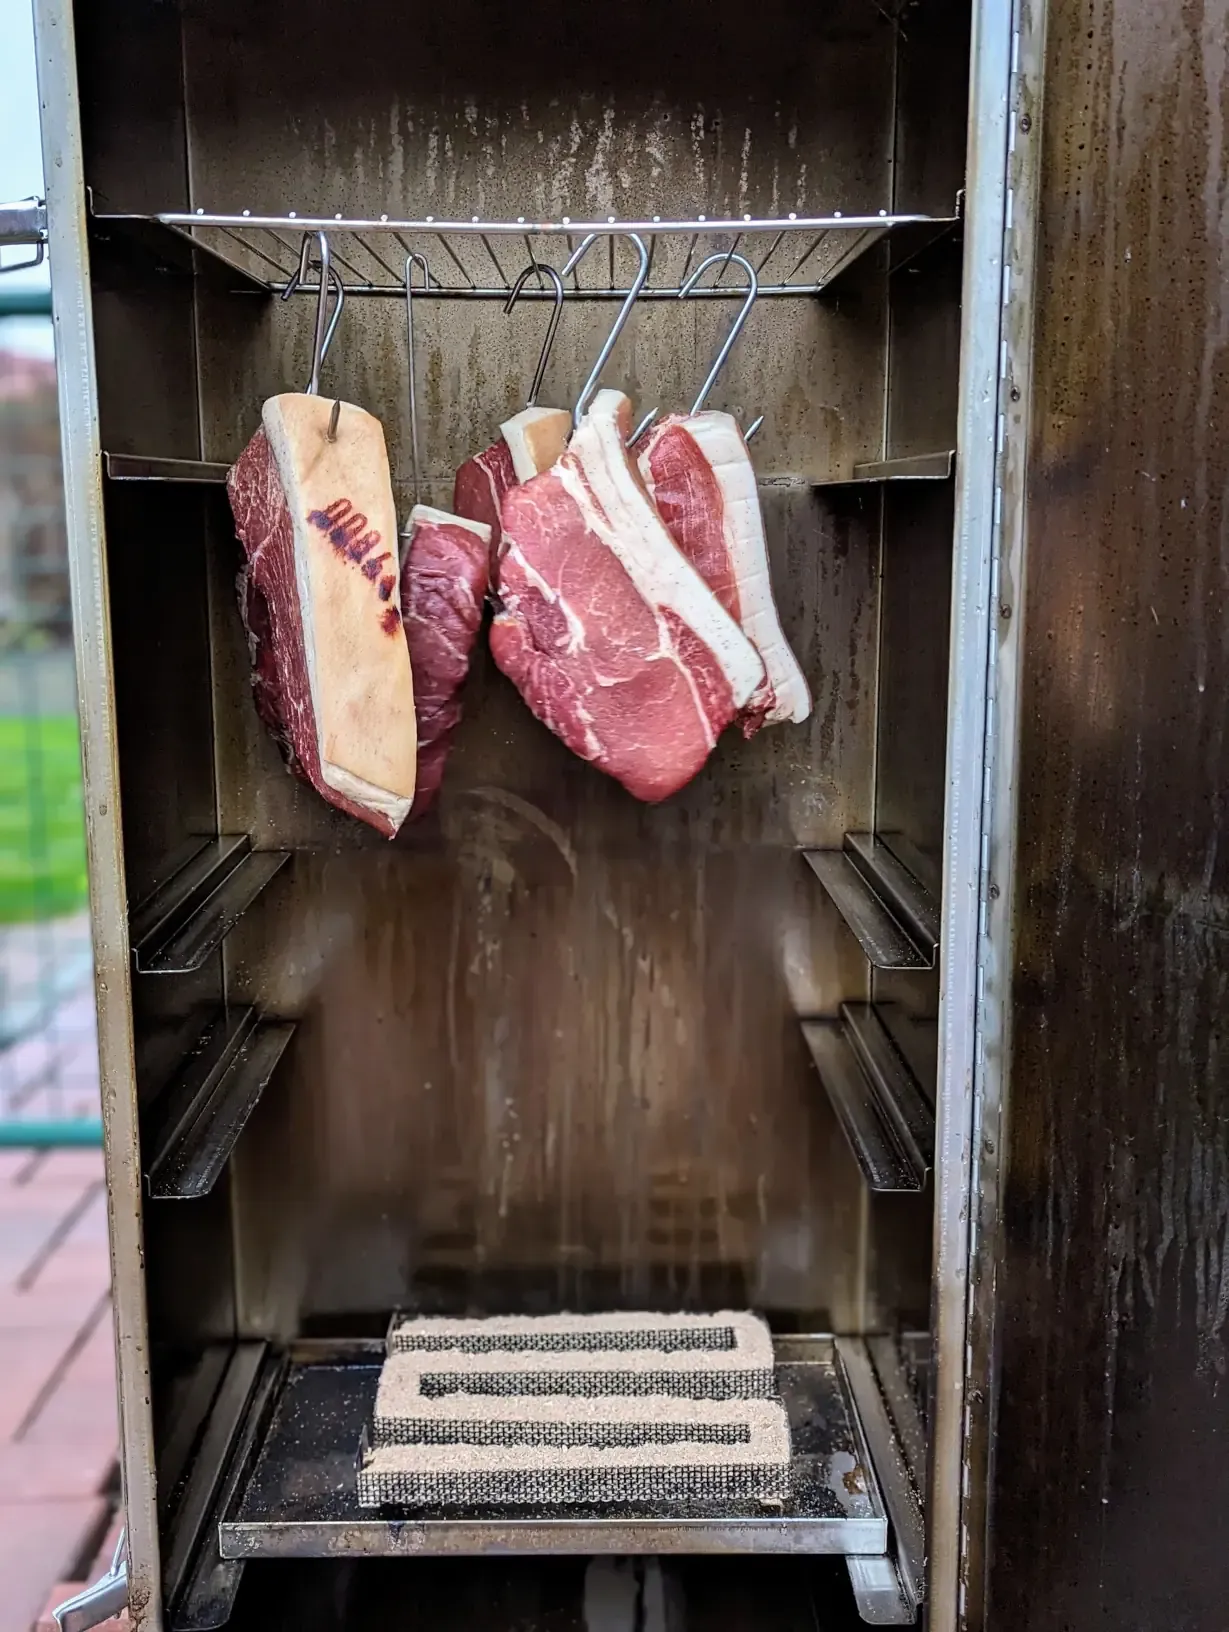 Ready for smoking in the
 grimy-ass well-seasoned smoker
I’ve got a simple smoking cabinet that I mostly use to hot-smoke fish. It works just as well for cold smoking. I’m lucky to have my own smoking cabinet, but you can start much simpler if all you care about is cold-smoking. I’ve seen people do it with large paper boxes or home-built wood boxes. You should be able to use an regular grill for this kind of work, too.
You see that little snake-y thingy down there in the smoker? That little thing is doing all the hard work for us here. In Germany, we call this a “Sparbrand” or “Räucherschnecke” (literally “smoking snail” — beautiful language, huh?). It’s filled with fine beech wood shavings and once you light it on fire on one end, it’ll slowly burn the wood shavings over a period of about 12-14 hours, creating a gentle amount of smoke without raising the temperature significantly. After all, we want to cold-smoke this ham and avoid cooking it.
Using this set up, I smoked my ham for 4 passes. 12 hours of smoking over beech wood followed by 12 hours of rest, rinse and repeat. After each pass I could see the ham turning a little more yellow-brownish. Kinda like the walls in your chain-smoking aunt’s apartment back in the 80s, remember?
This is what it looked like after the first pass:
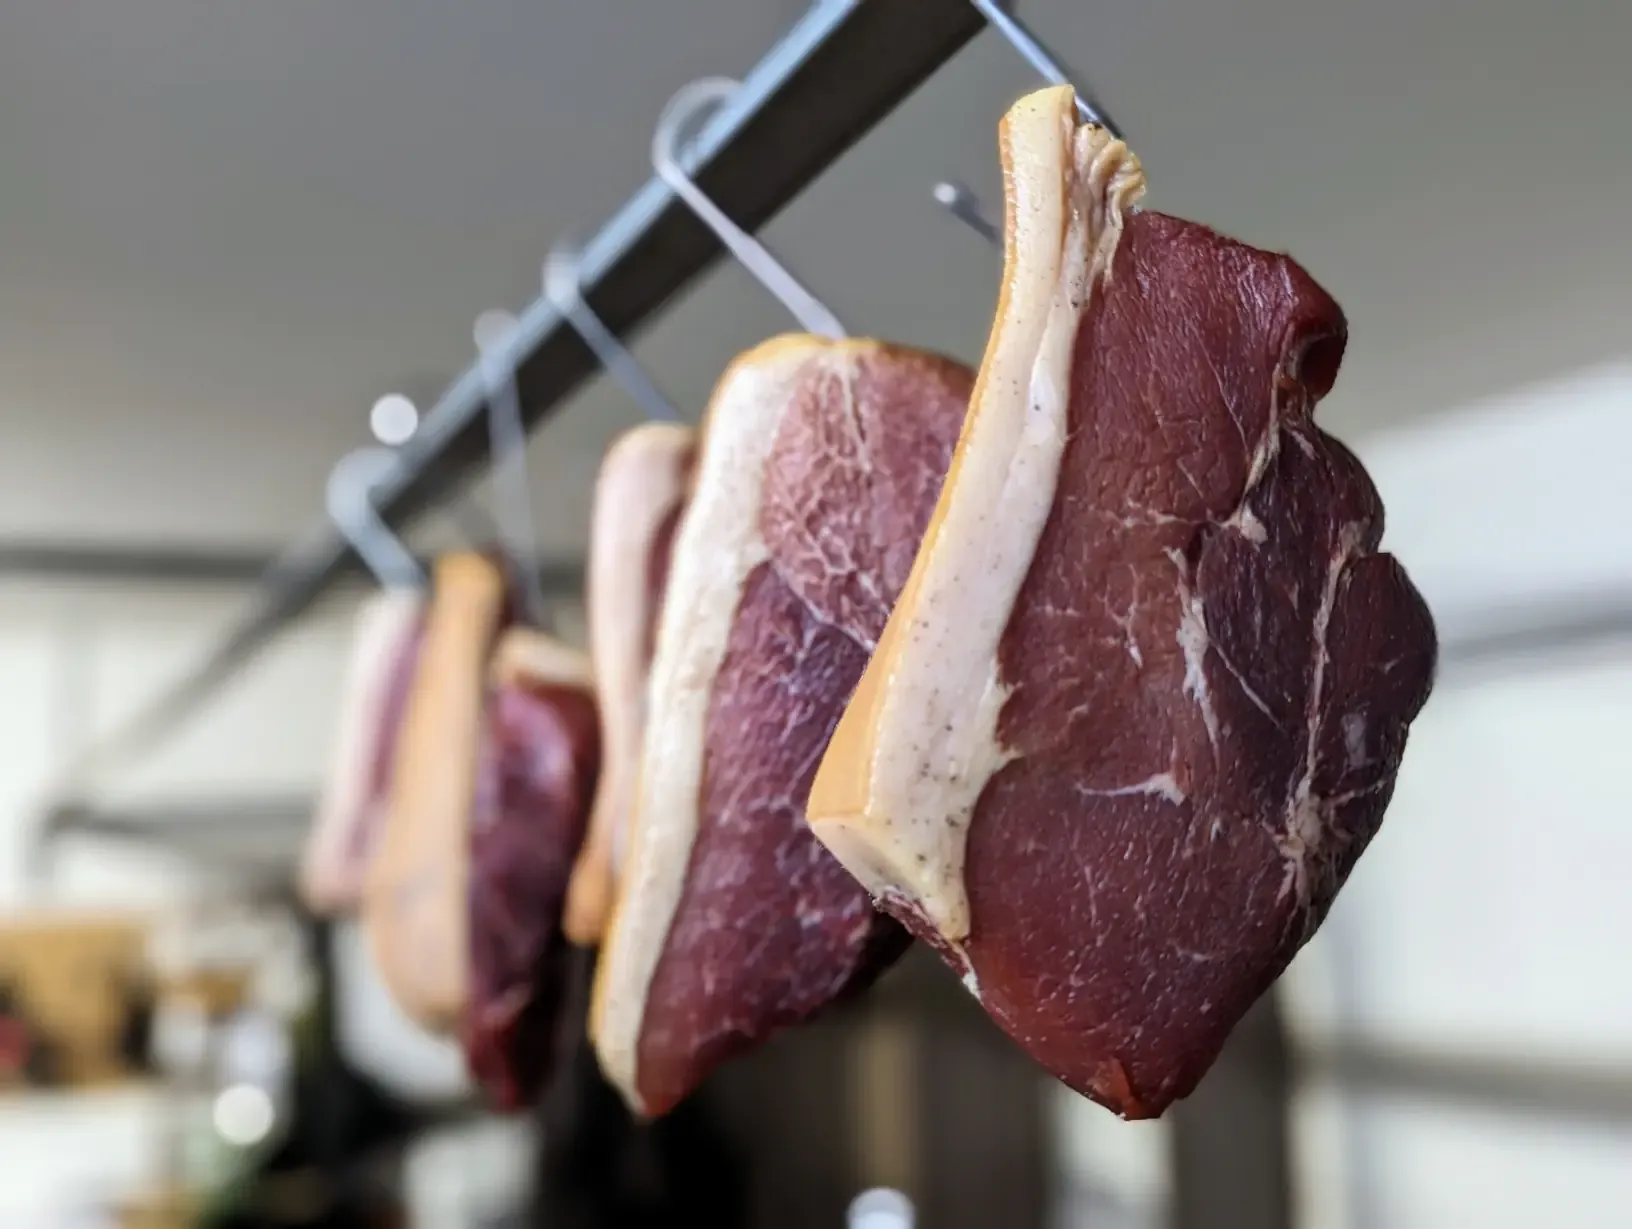 My ham after the first pass of cold-smoking. See the skin turning a little yellow-ish?
Step 4: Air-Drying & Aging
At this point your work is mostly done — you can sit back and let the meat hang around and do its thing now. You just occasionally check whether everything’s looking good and take a whiff of that delicious ham smell when nobody’s watching. Air-drying is nothing more than hanging the hams to dry and age in a well-ventilated and somewhat cool room. Again, a cellar works well, so does a garage, or a dedicated drying cabinet for the fancy pants out there.
The overall goal of the entire procedure is to reduce the overall weight of the meat by about 30% (the weight loss indicates that the meat dried, it’s just water that’s gone here) — depending on how fatty your cut is. Once you got that much moisture out of your ham, you’re basically done and can enjoy the fruits of your labor. The aging phase is where your ham will develop its flavor and texture. With more age you’ll get a dryer and more flavorful ham.
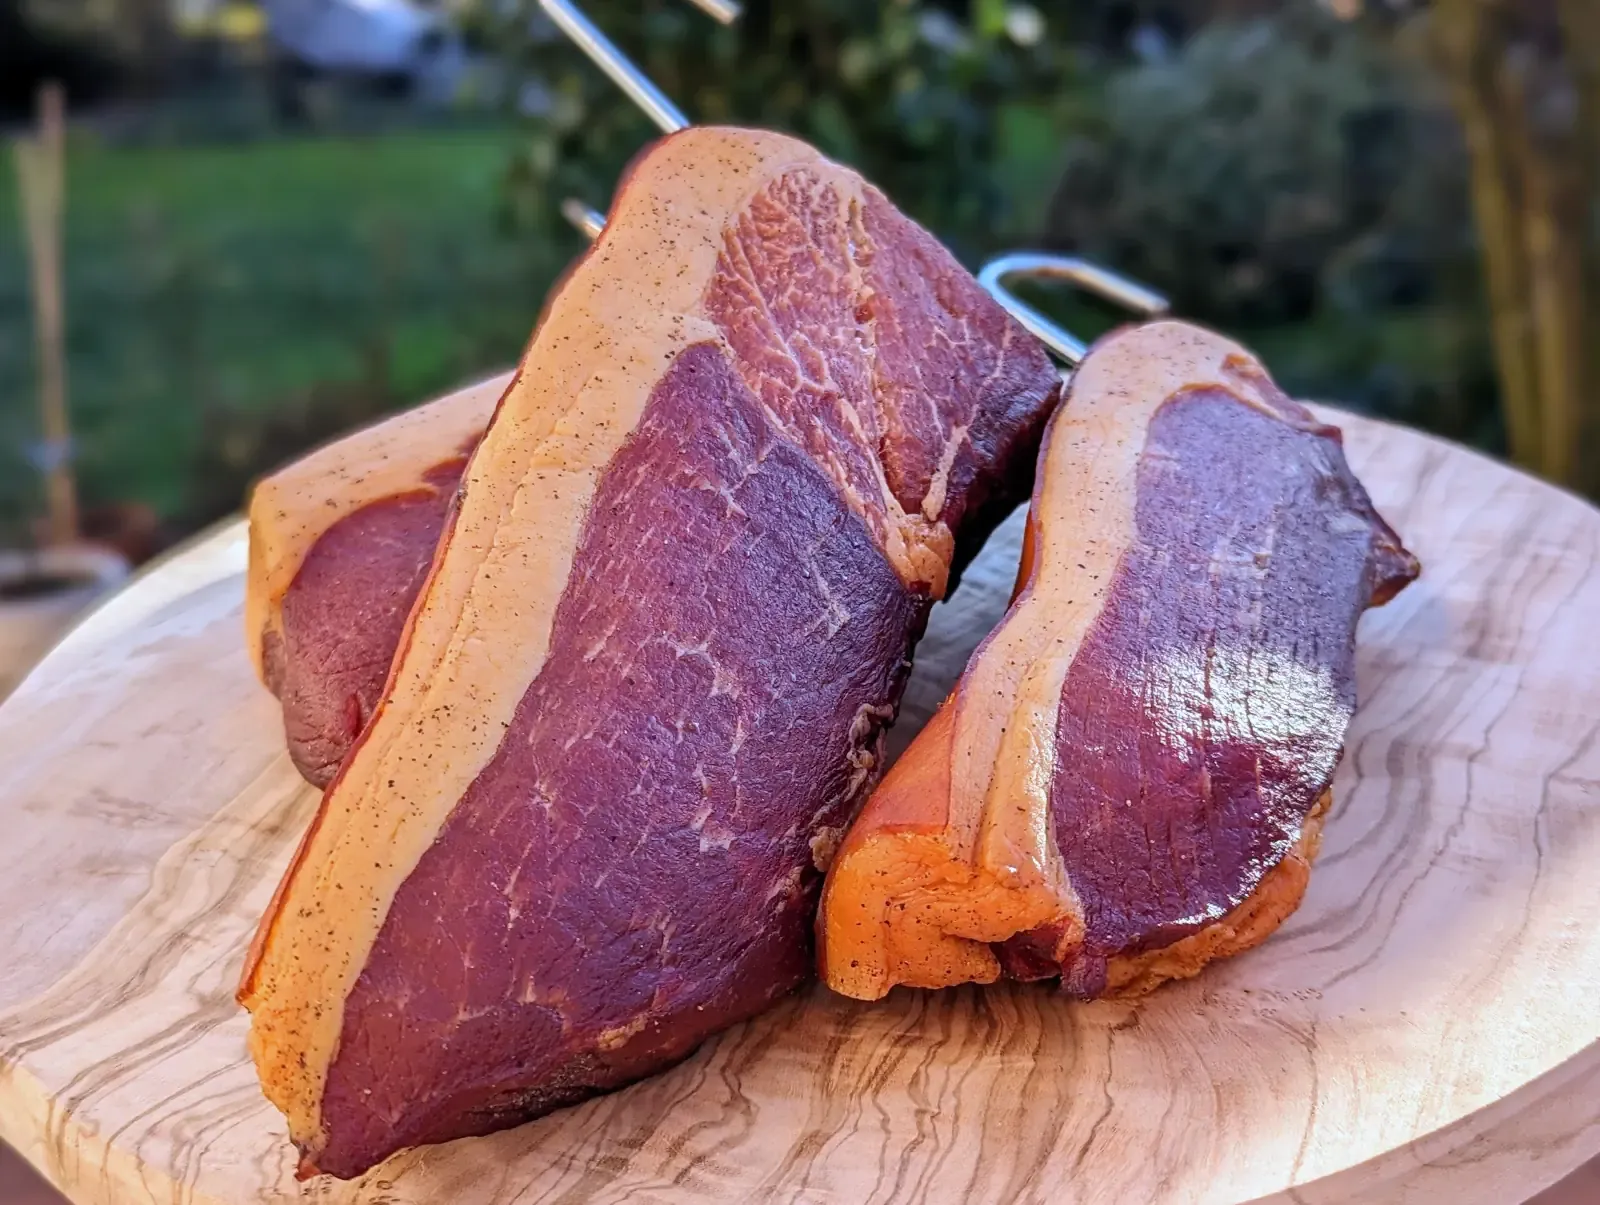 And we’re done. Smoked and dried ham.
Personally I let my hams dry for at least 3-4 more weeks before eating and serving them. Unless I’m particularly impatient and decide to go for a test slice earlier, that is. I found that after about 3-4 weeks of aging the consistency is great and the taste is starting to be at the right intensity. Some people go (way) longer than that, up to a year even — that’s really mostly up to your taste, the environment you’re aging your hams in, and how convenient it is for you to hang your hams to dry. I know that I’d get in serious trouble with my dog if I hung delicious ham out to dry in the garage for months on end.
Once your ham is at your desired level of done-ness, you can stop the aging process and store it some longer by putting it back in a vacuum sealed bag. Alternatively you can also enjoy one piece at a time and see how the flavor develops over time. Up to you!
Final Step: Enjoy
I hope my walk-through showed you that making your own ham is really not that complicated. It’s a process that takes time and a few steps, but the hands-on work required from you is fairly low.
I find it highly rewarding to dig into this ancient way of preparing food, going through the whole curing, drying, smoking, and aging process, and ultimately enjoy the product of my work and being able to share it with friends, neighbors, and family. It’s wild to think that you preserved a piece of raw meat and made it last for months if stored correctly without ever exposing it to heat or refrigerating it.
Here’s the first cut of my 2023/2024 batch of ham, served on a proper rustic German-style Butterbrot with some pickles. Damn good.
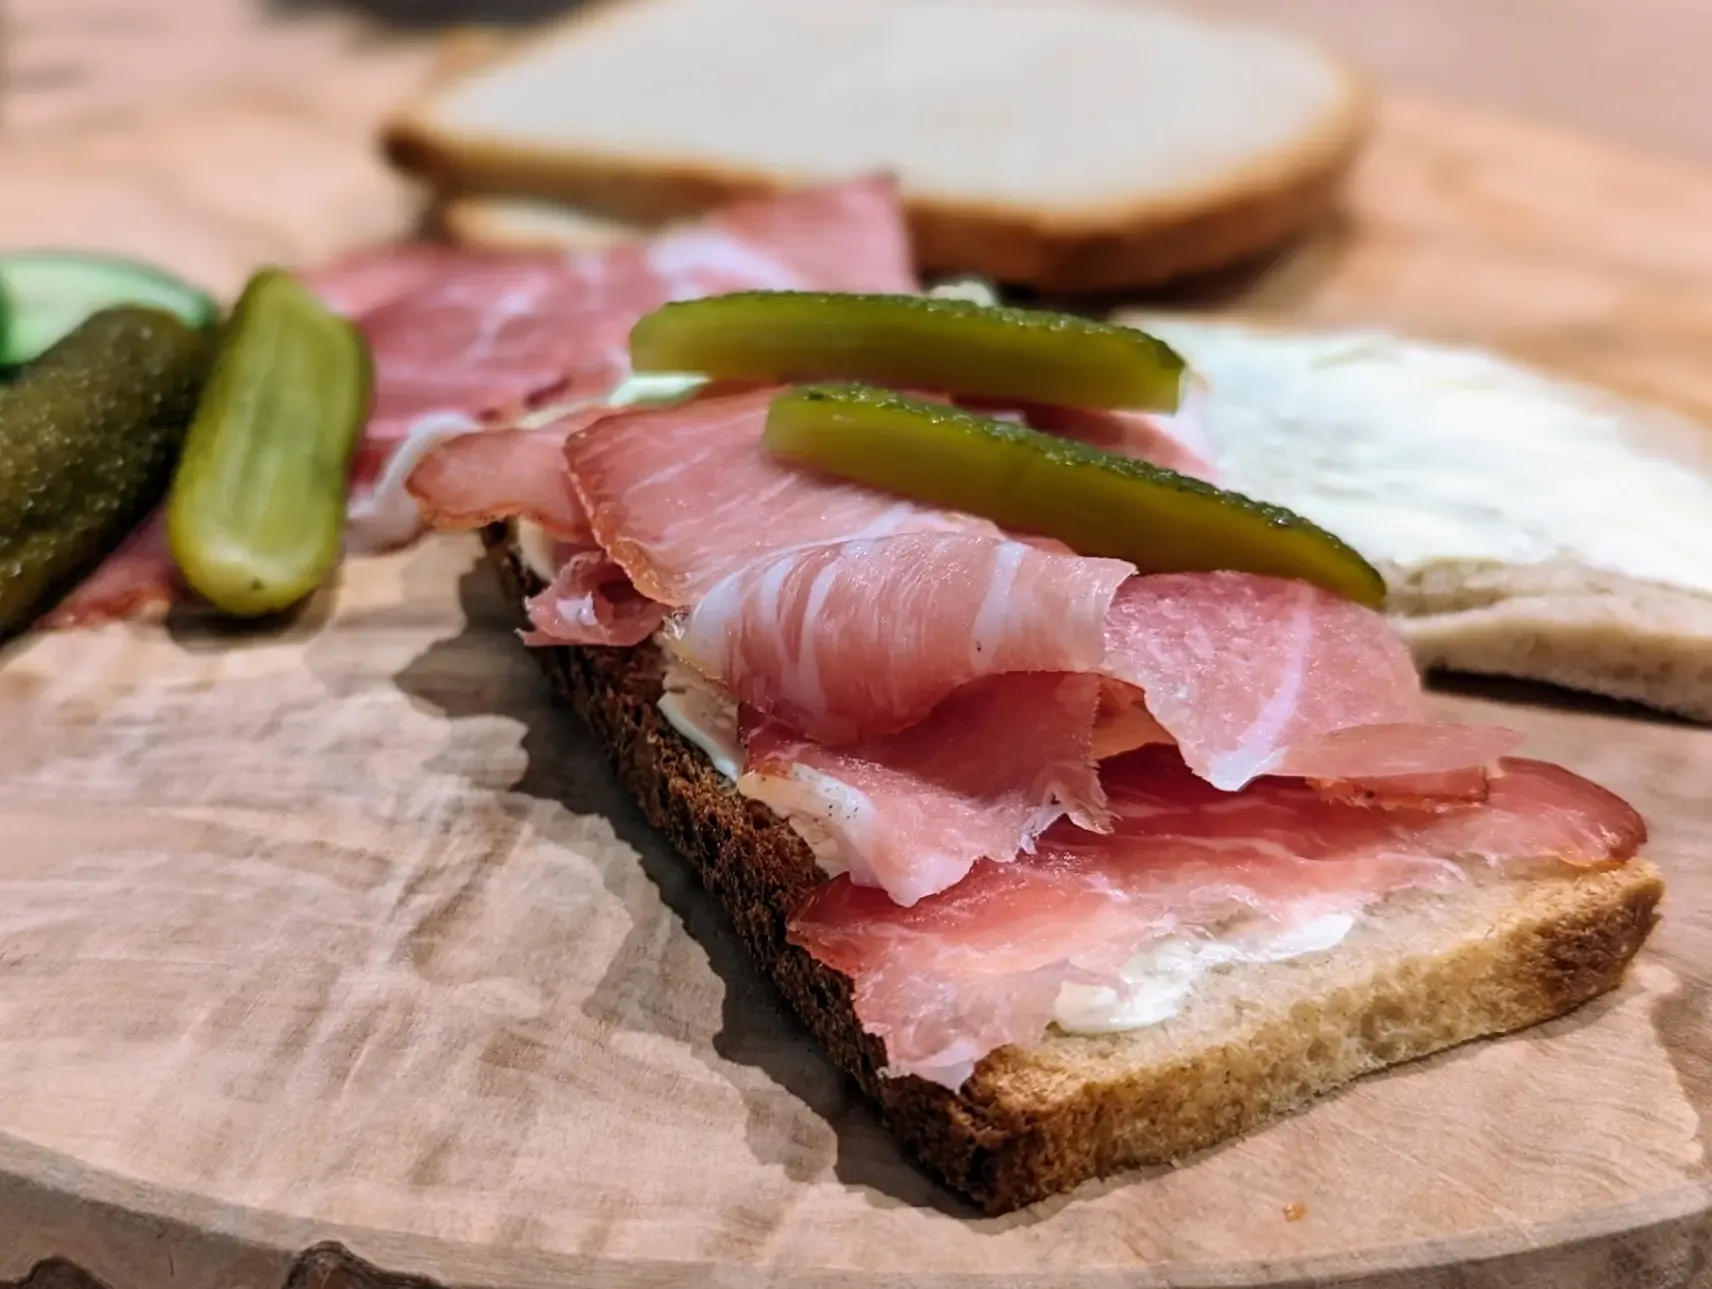 Ham on a Butterbrot
If I inspired you to try this yourself, give me a shout-out on Mastodon — I’d love to see what you come up with.
Have fun!
Footnotes
-
I make this sound a little simpler than it actually is. You don’t just take any kind of salt, you use a special curing salt. And you have to calculate the right amout of salt for your food correctly, depending on the curing method you’re gonna use. ↩
-
You won’t believe me when I say this but this pun is pure coincidence. “Ham”, my nickname, has got nothing to do with meat. But it works well, so I’m leaning into it. ↩